I replaced the headlight housings on my Hyundai Sonata 2004. It was easy and I figured I will document it. This probably applies to 2002, 2003 and 2005 Sontas since the headlight housing is identical.
I purchased the housings on e-Bay from auto_lighthouse. I am happy with the purchase, and my housings came within a few days and they came with the lamps already installed.
Removing and Installing the Housing
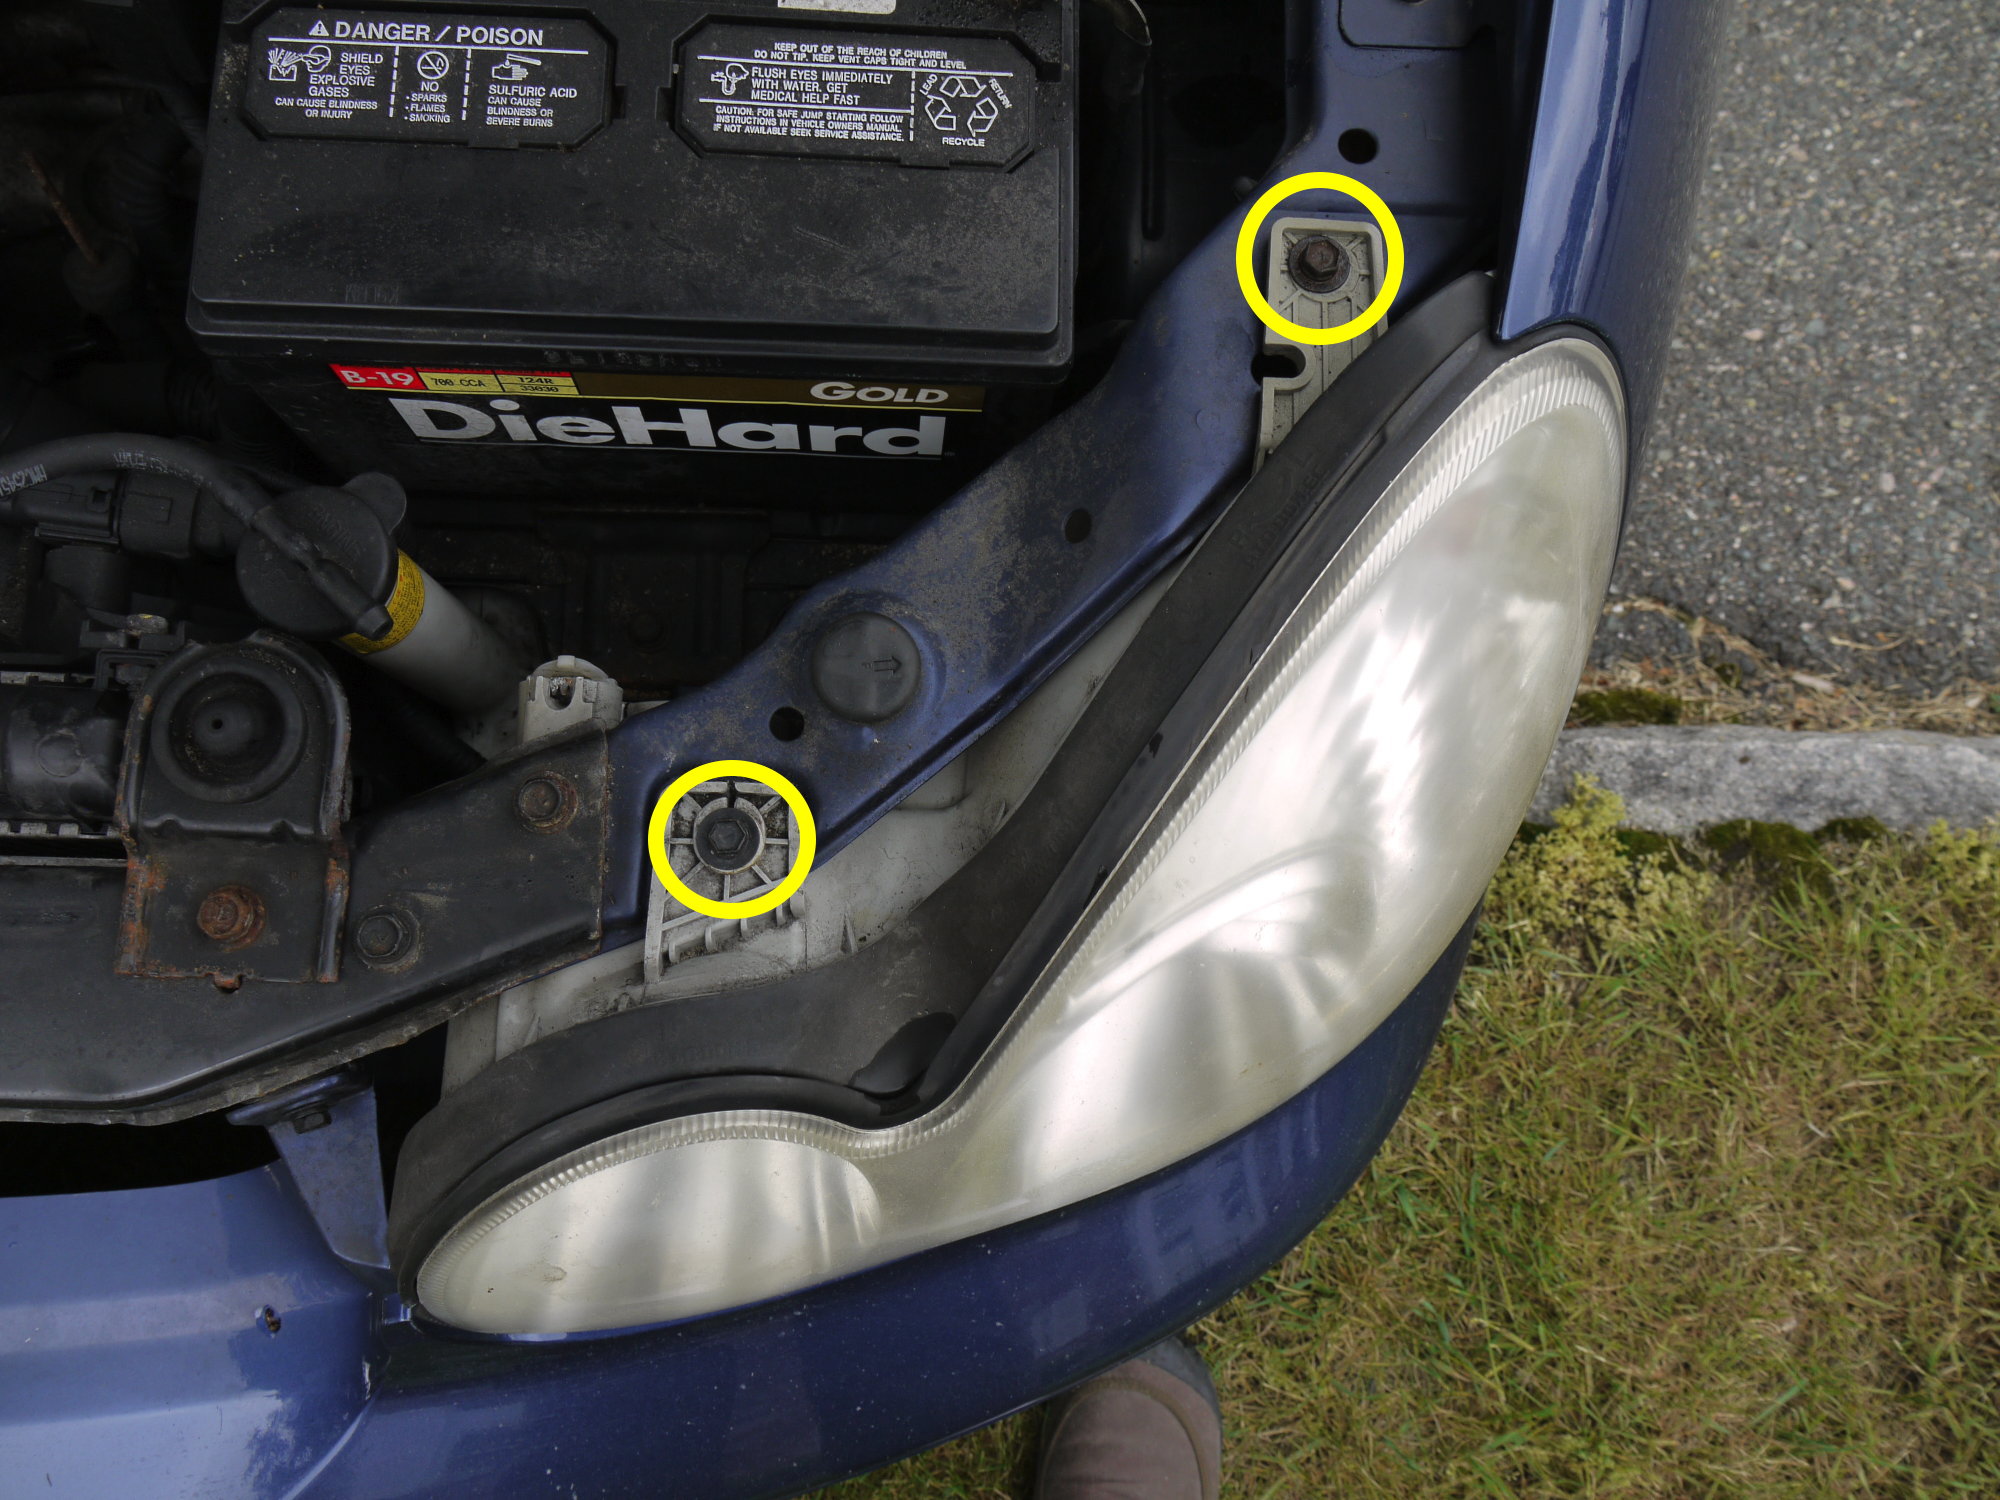
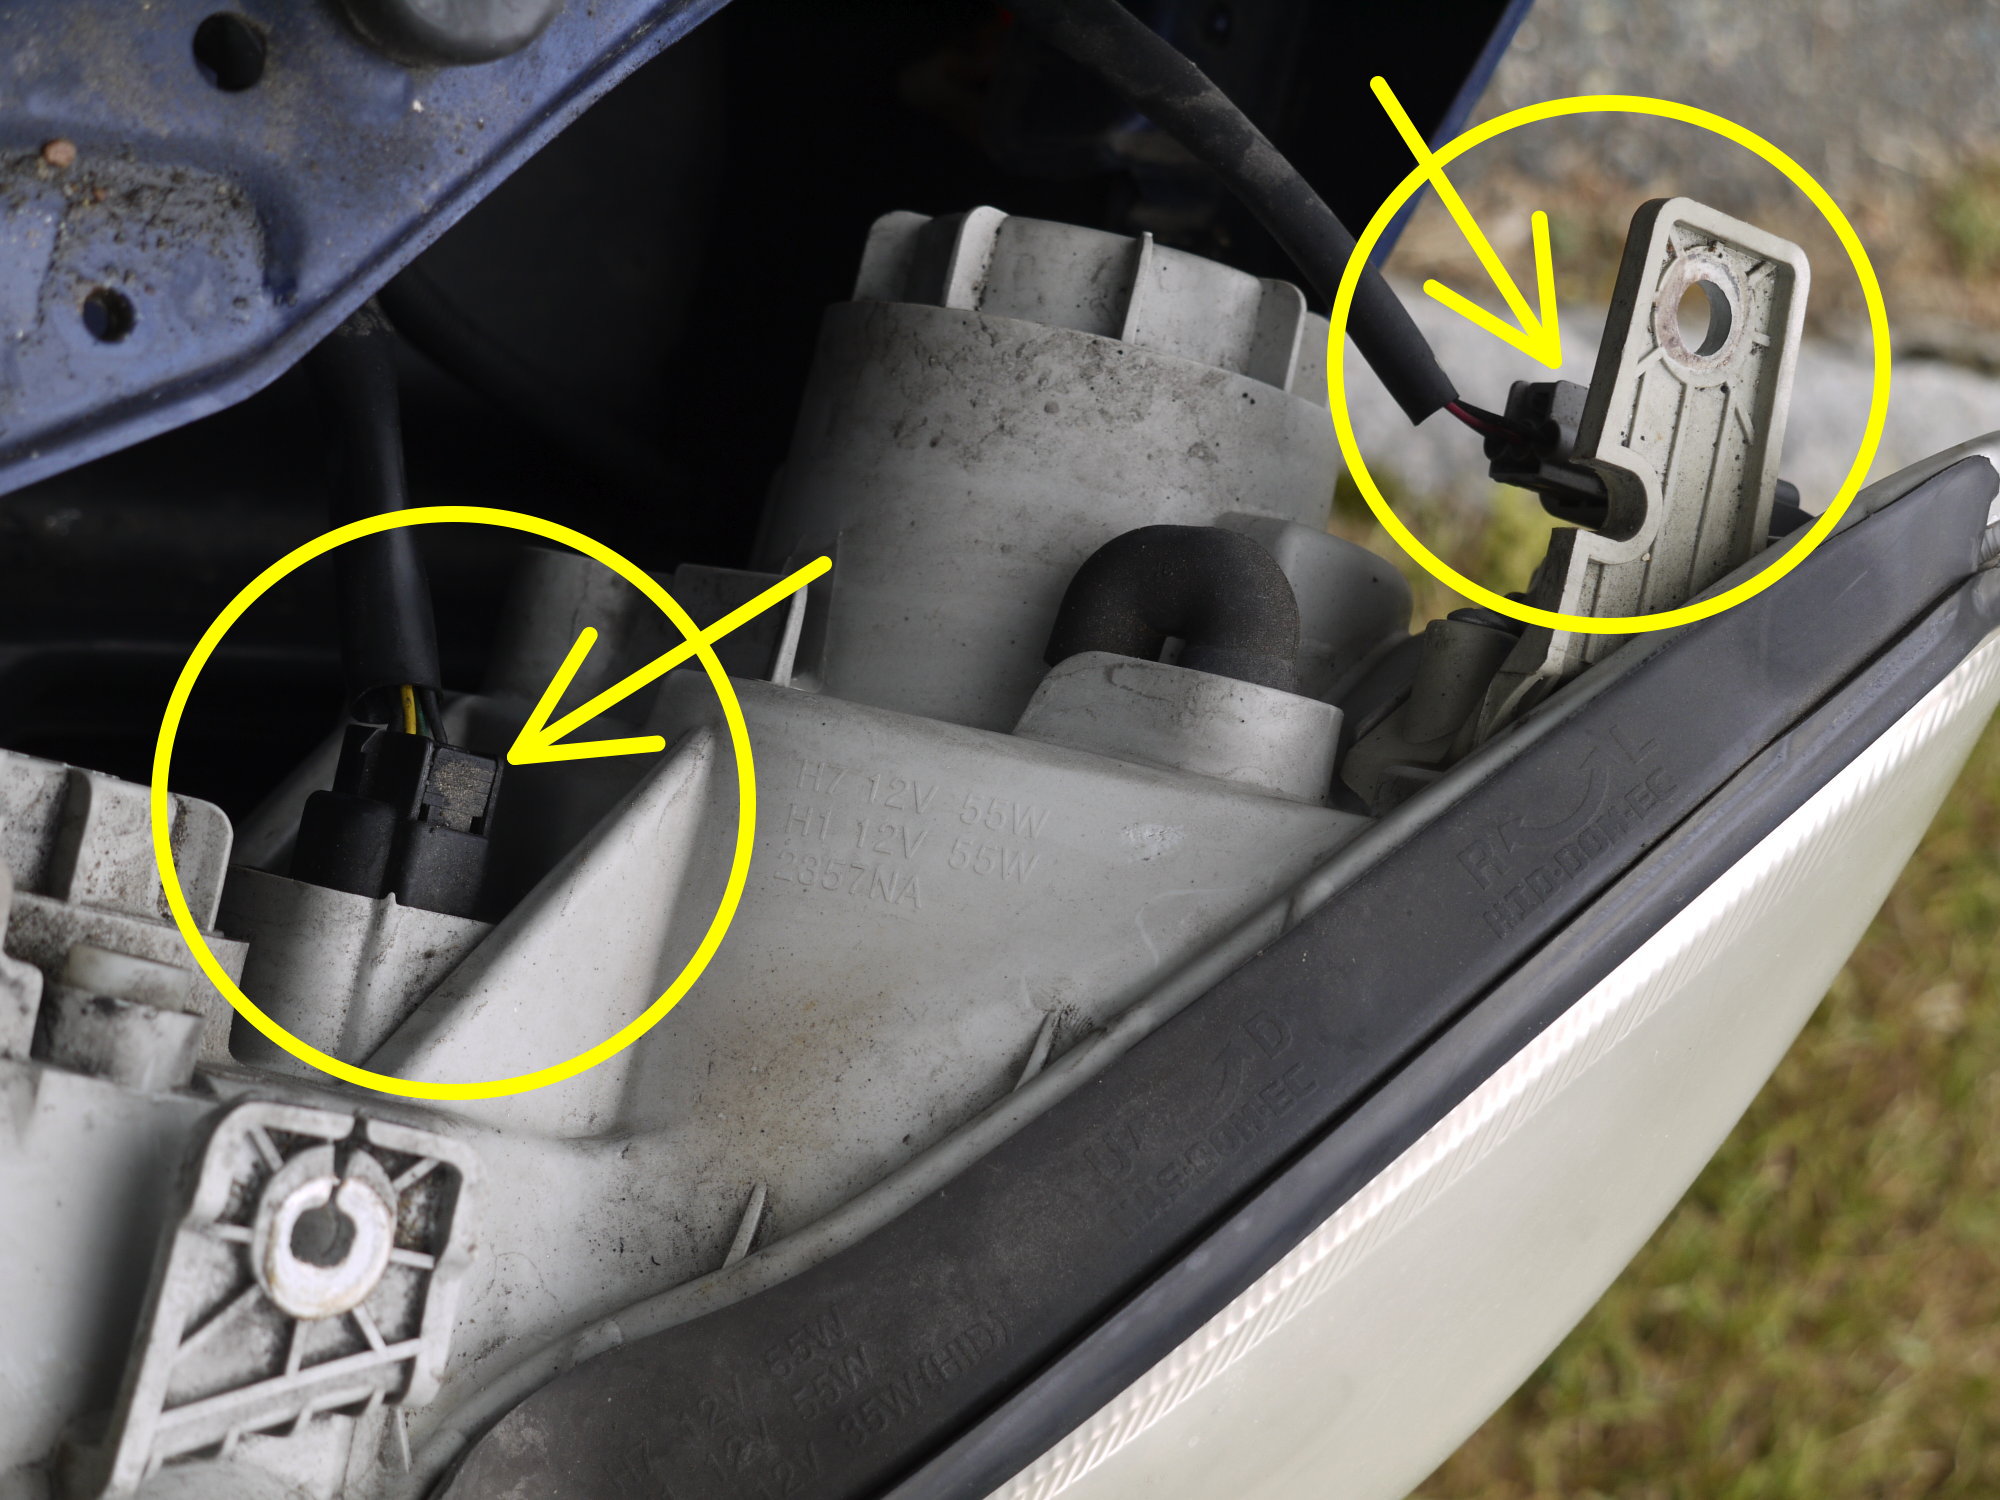
There are three bolts (10 mm metric) - two on top (first picture) and one on bottom, circled yellow. Just undo and pull the unit out and upward a little. Once the housing is clear of the body, unplug two cables. The connectors have a push-in latch (yellow arrows). You can click on an image to view a larger picture

Beam Adjustment
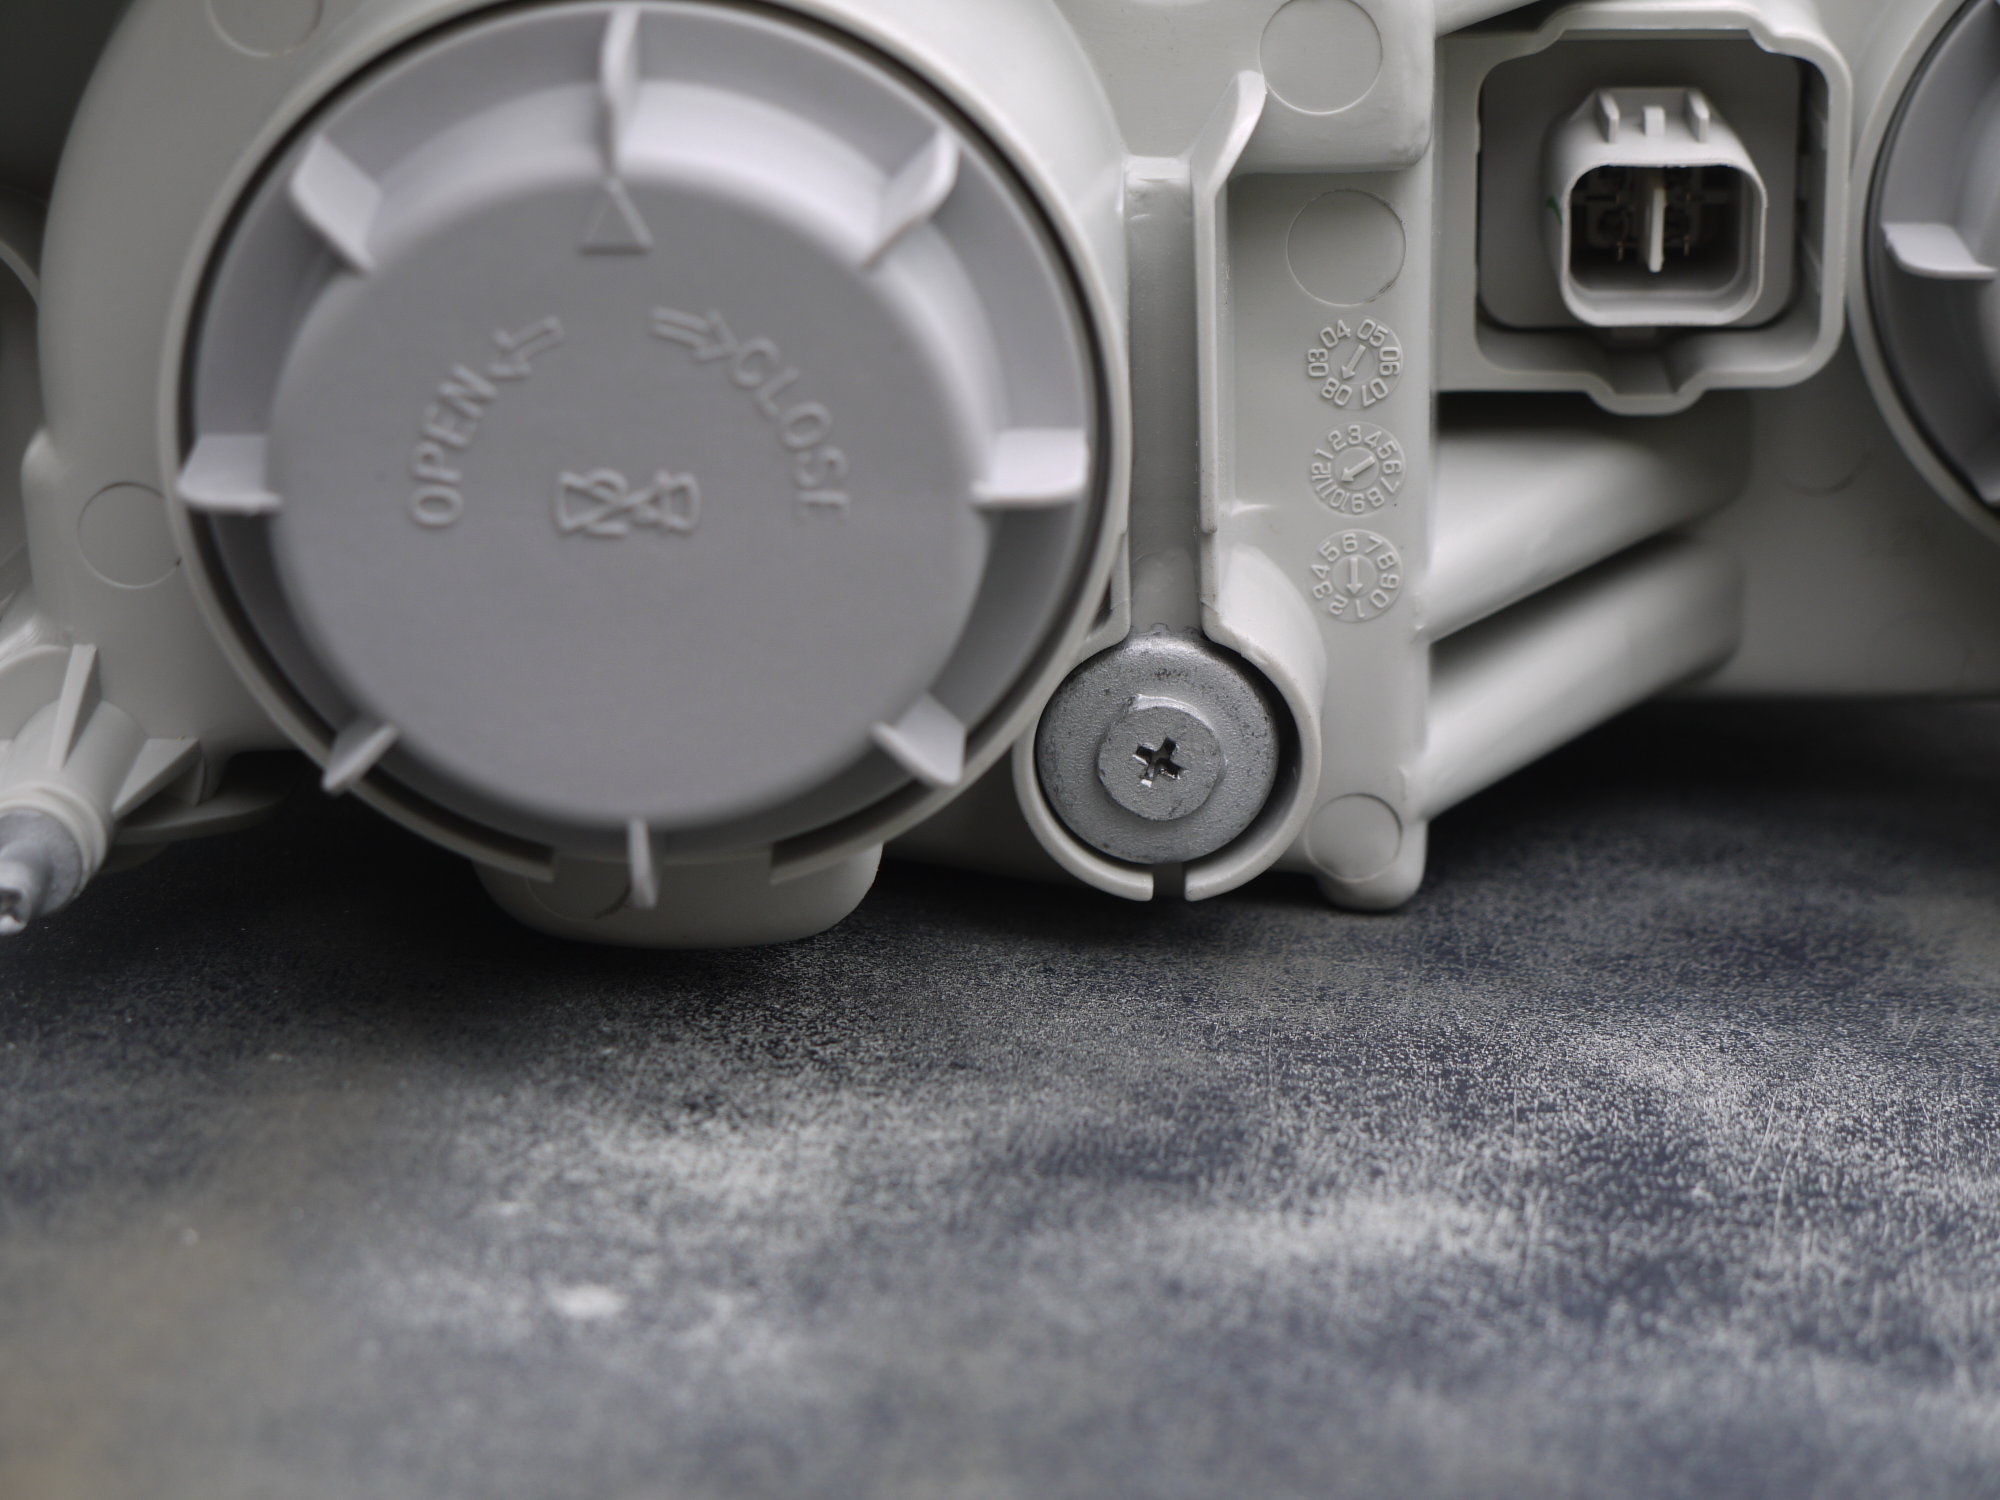
I saw a screw/gear by the low beam (ywllow circle), and I believe that's for the Up-Down adjustment. I saw another one by the high beam (red circle), which is probably for the Up-Down of the high beam? I did not see screws for the horizontal adjustment and that seems to be fixed? The screws may have a plastic cap

Bulb Replacement (low beam)
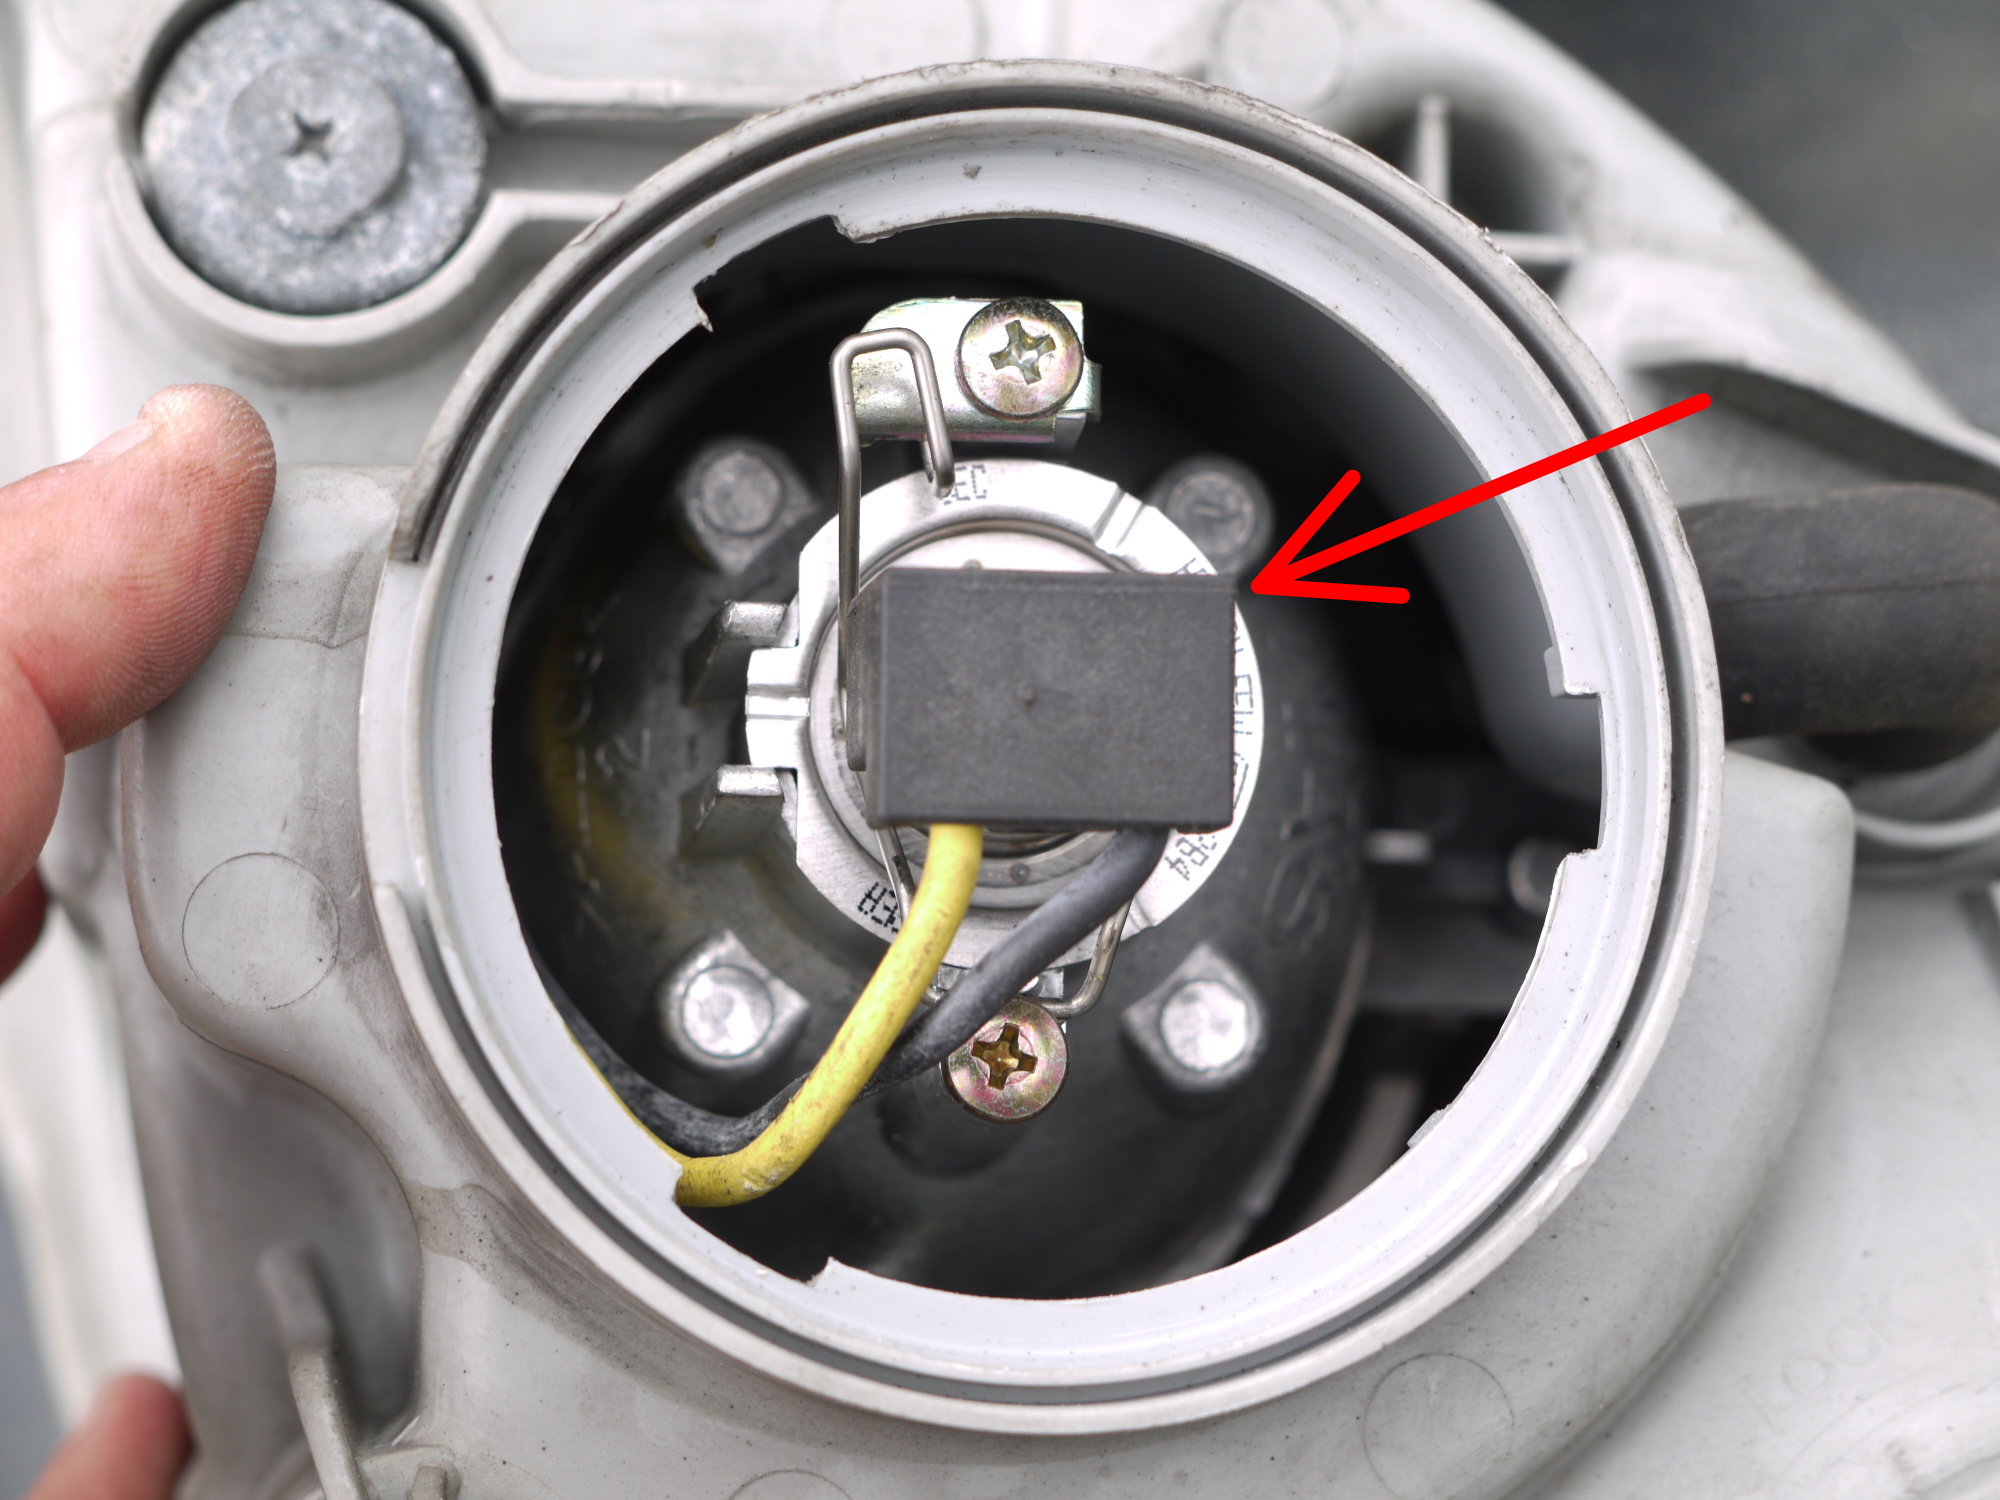
The low beam uses an H7 bulb. The bulb area is pretty crowded and I think it's easier to pull the housing unit out (takes only a few minutes) and to access the bulbs. To replace, you remove the large plastic cap first and that exposes the bulb. Unplug the cord (red arrow, first picture). You see a retaining tension clip (yellow arrow, second picture). Press it down and rotate out of the holder, as seen in third picture (yellow arrow). You can then pull out the bulb. When you insert the new bulb, (a) do not touch the glass surface with bare fingers and (b) try not to scratch the glass surface against the metal housing. The bulb can only go in one way - see the notch (red arrow)
Bulb Replacement (high beam)
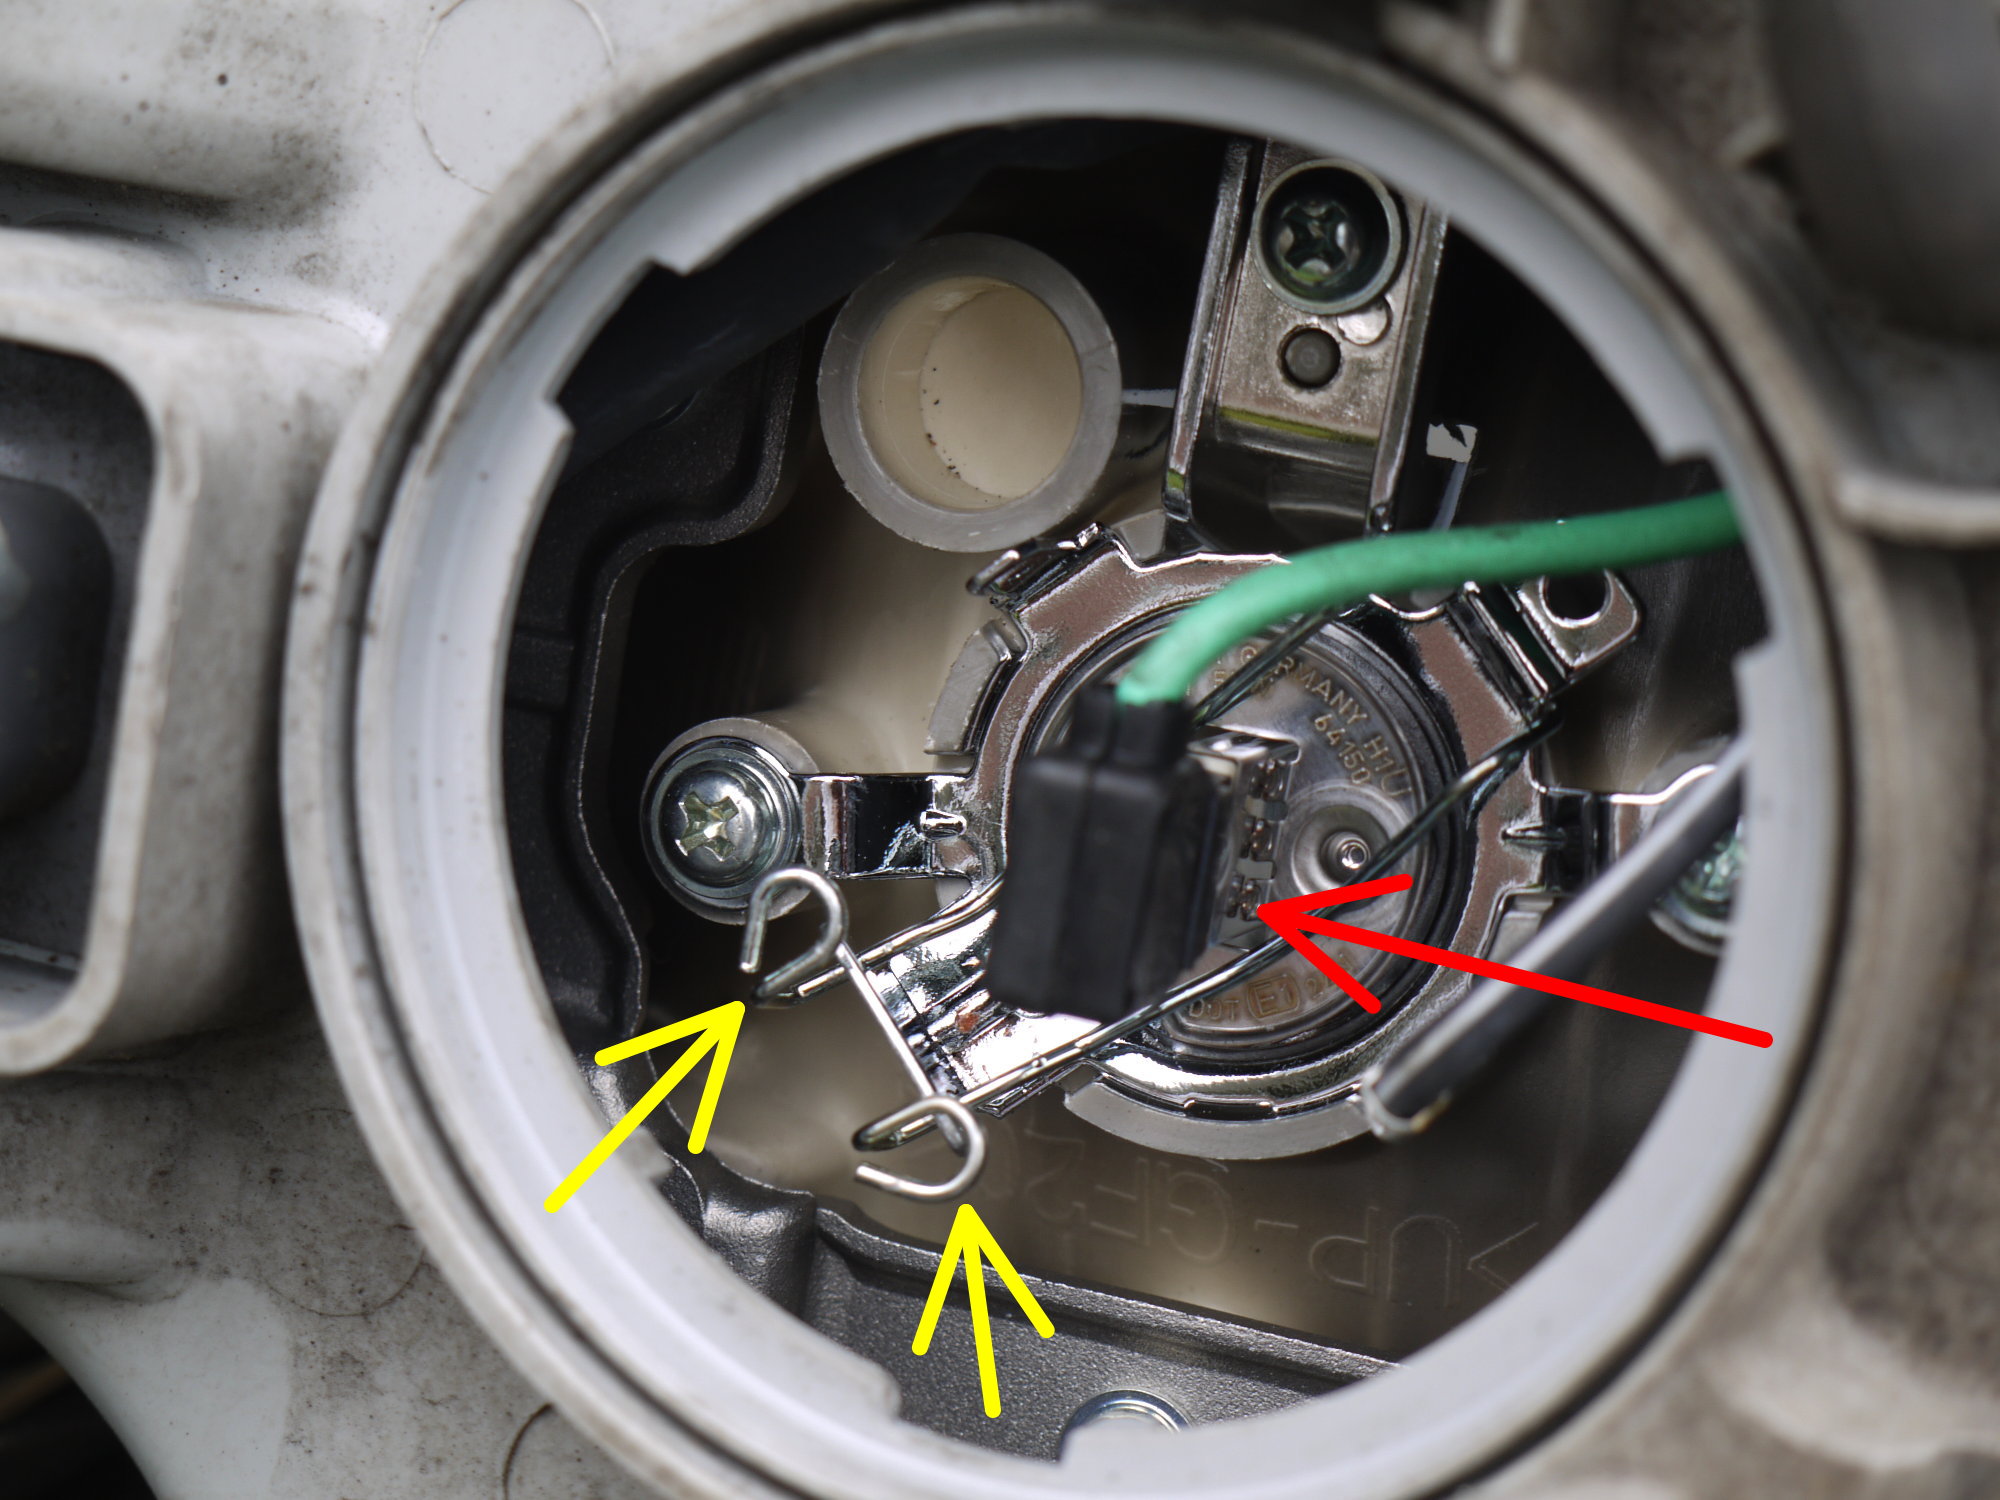
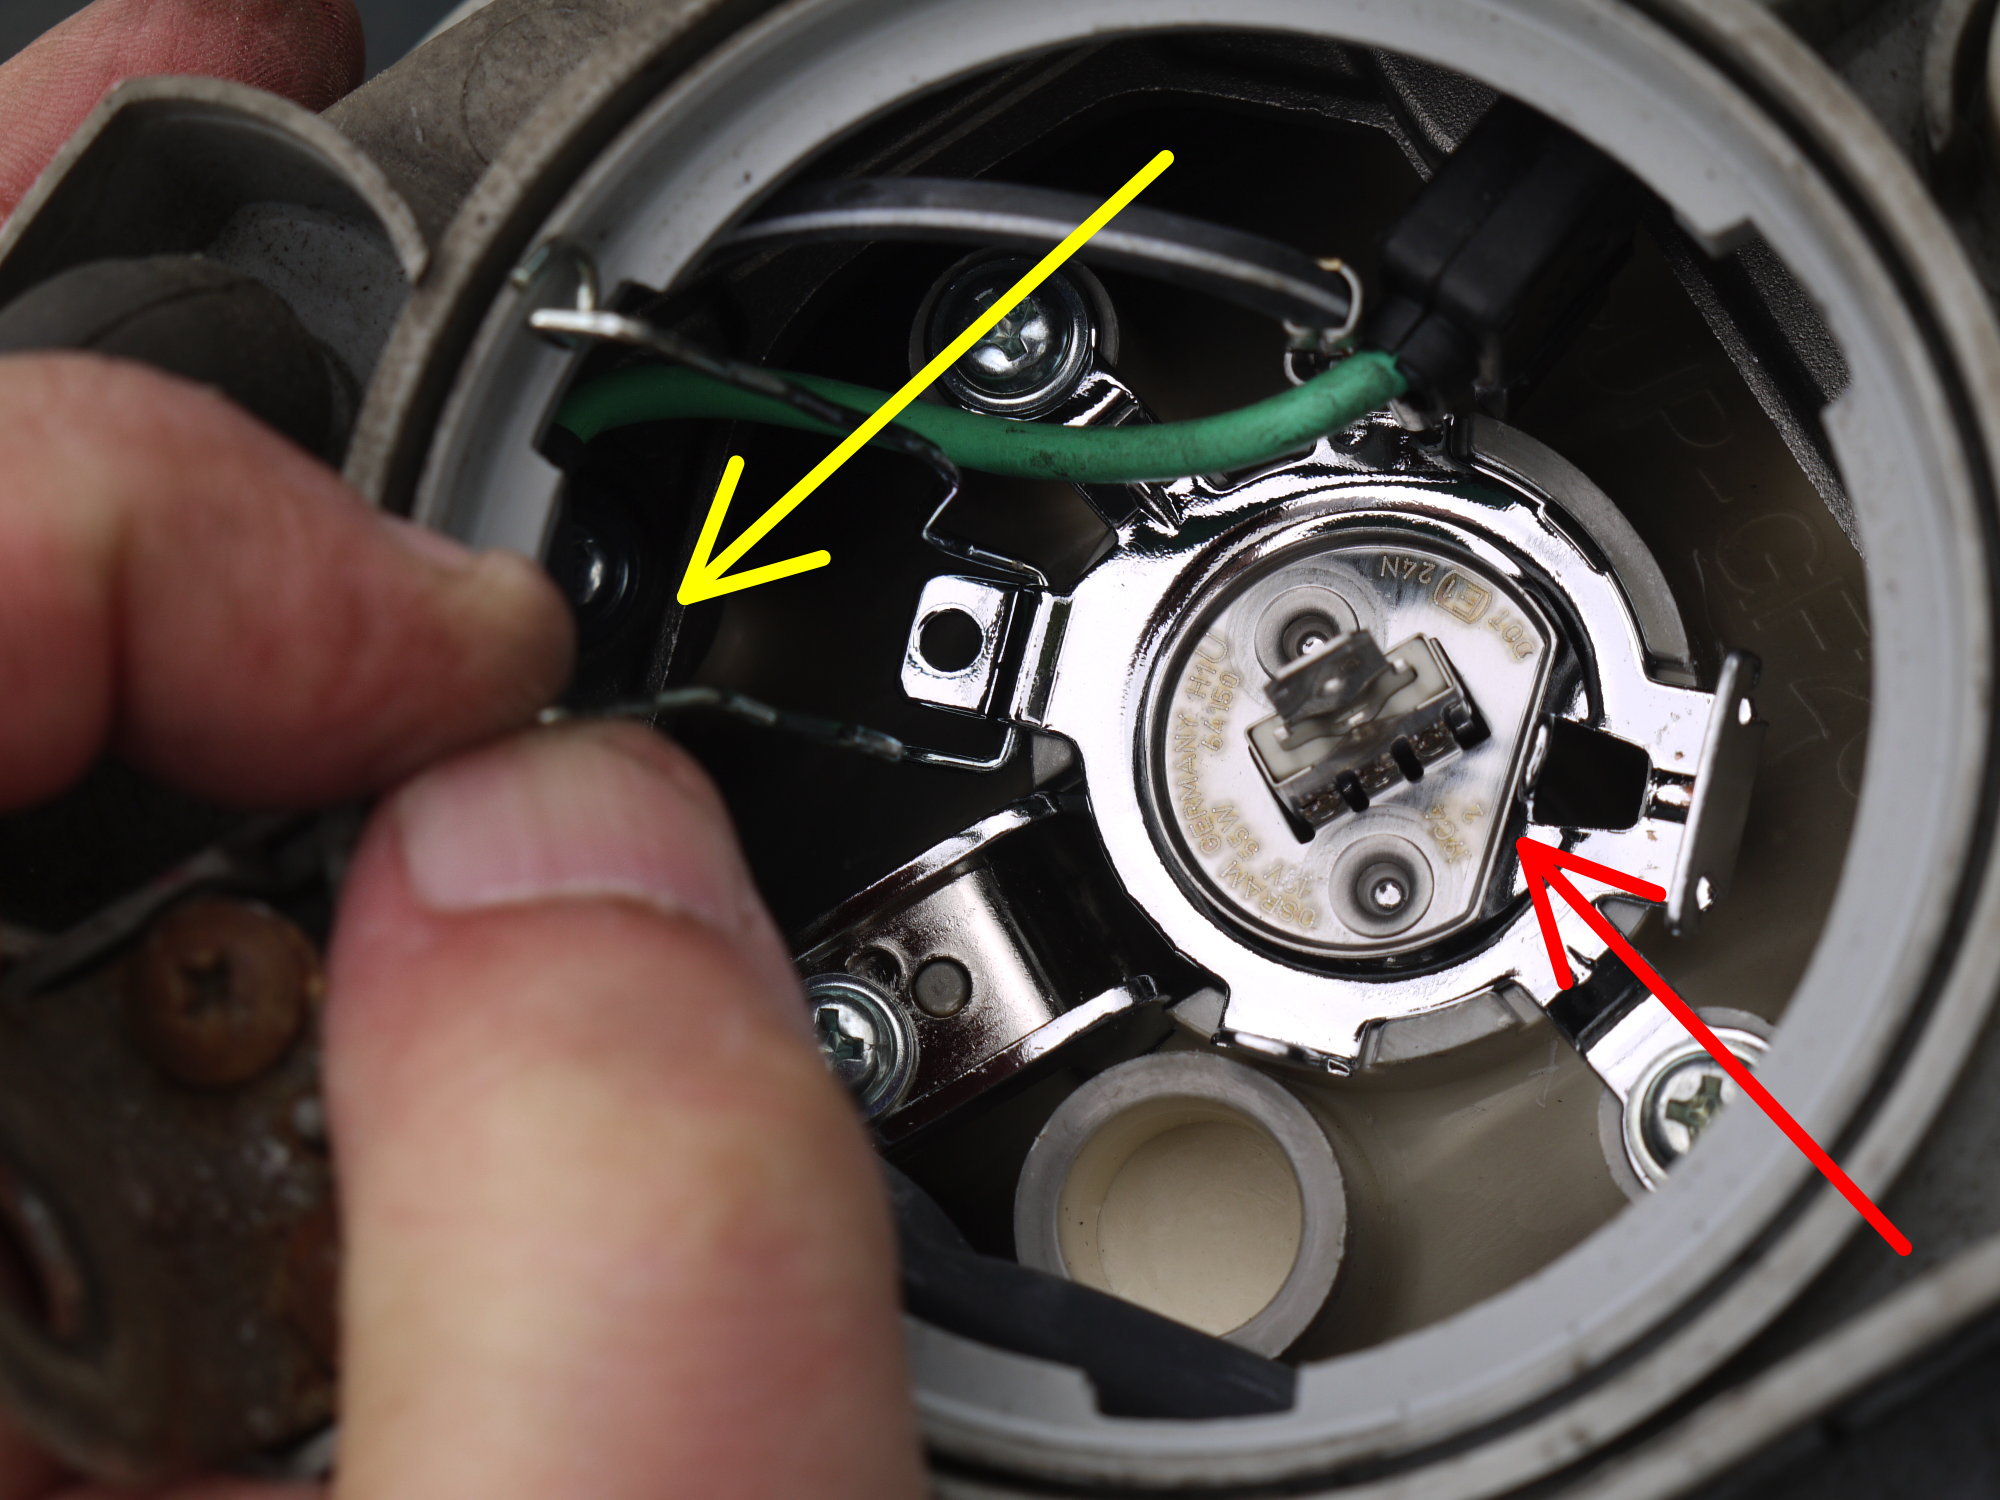
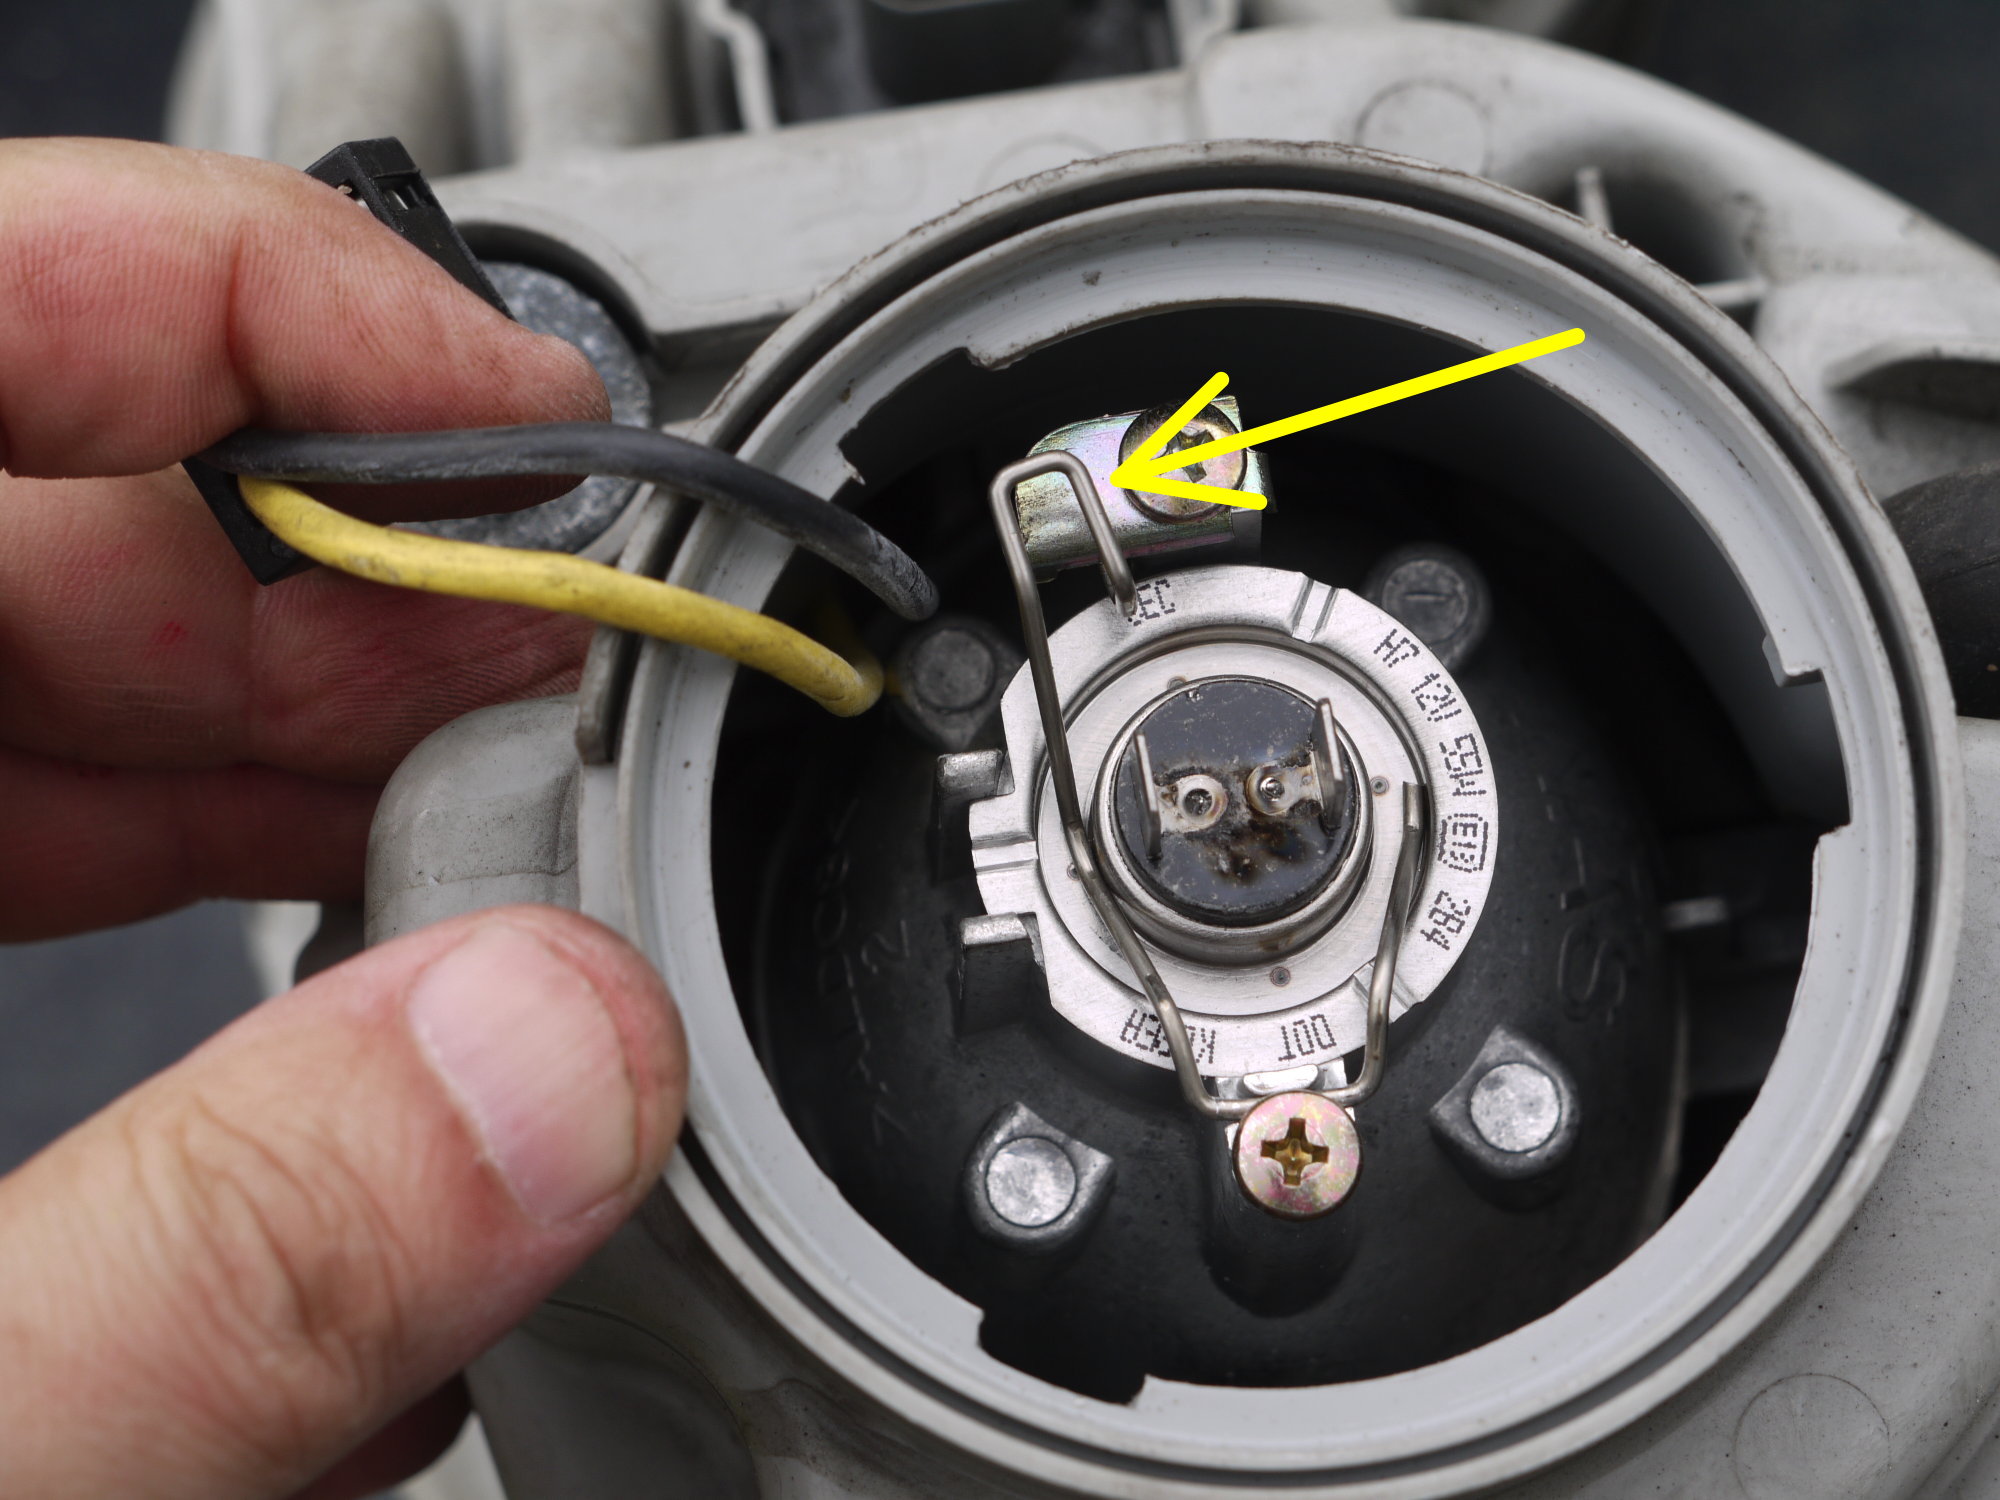
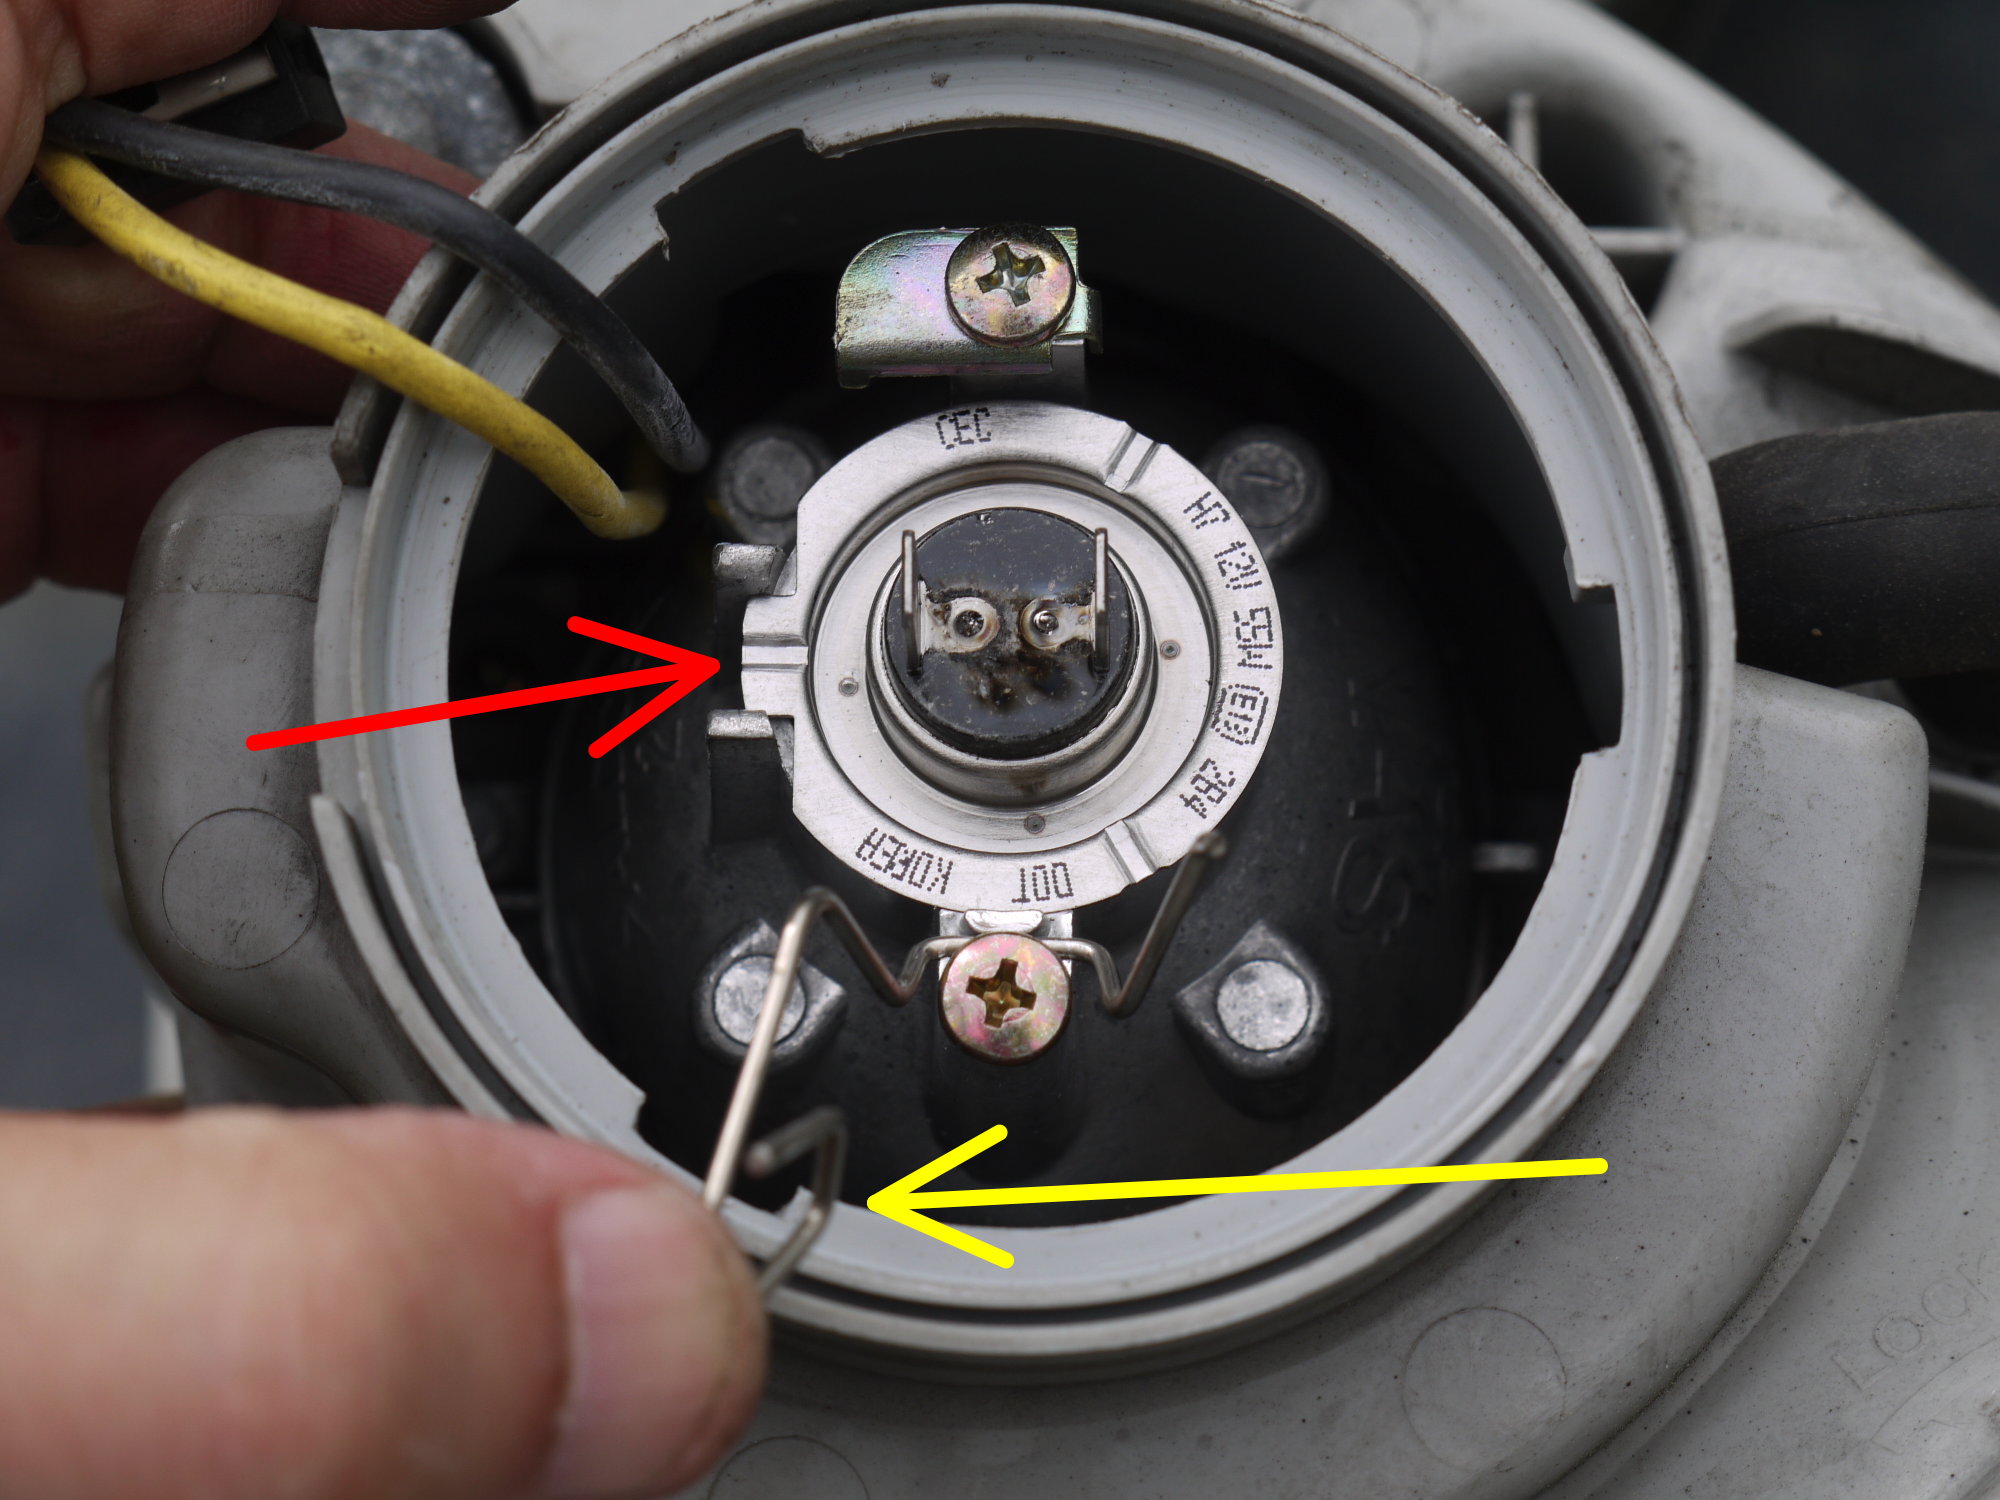
The high beam uses an H1 bulb. The bulb area is pretty crowded and I think it's easier to pull the housing unit out (takes only a few minutes) and to access the bulbs. To replace, you remove the large plastic cap first and that exposes the bulb. Unplug the cord (red arrow, first picture). You see two retaining tension clips (yellow arrows). Press them down and rotate out of the holder, as seen in second picture (yellow arrow). You can then pull out the bulb. When you insert the new bulb, (a) do not touch the glass surface with bare fingers and (b) try not to scratch the glass surface against the metal housing. The bulb can only go in one way - see the notch (red arrow)